Making an anime figure out of polymer clay, part 1
April 19th, 2024
I've been looking at garage kits (resin kits of unassembled parts you have to glue together yourself and paint) and thinking of getting one, but then i realized I can probably sculpt an anime figure myself.. That's how this project was started.
I watched some videos 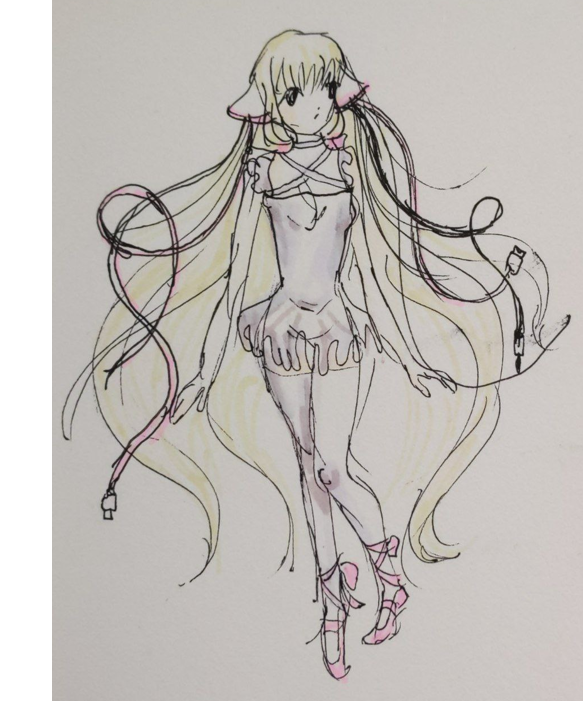 of people doing it, roughly estimated what I'll need, went out and bought clay.
There are other material options apart from polymer clay. One is air dry clay, it's based on cellulose and is water-soluble. Another option is to sculpt the figure with something like Monster Clay (it's an oil based sculpting medium and it doesn't dry or harden), make a silicone mold and cast the figure in resin.
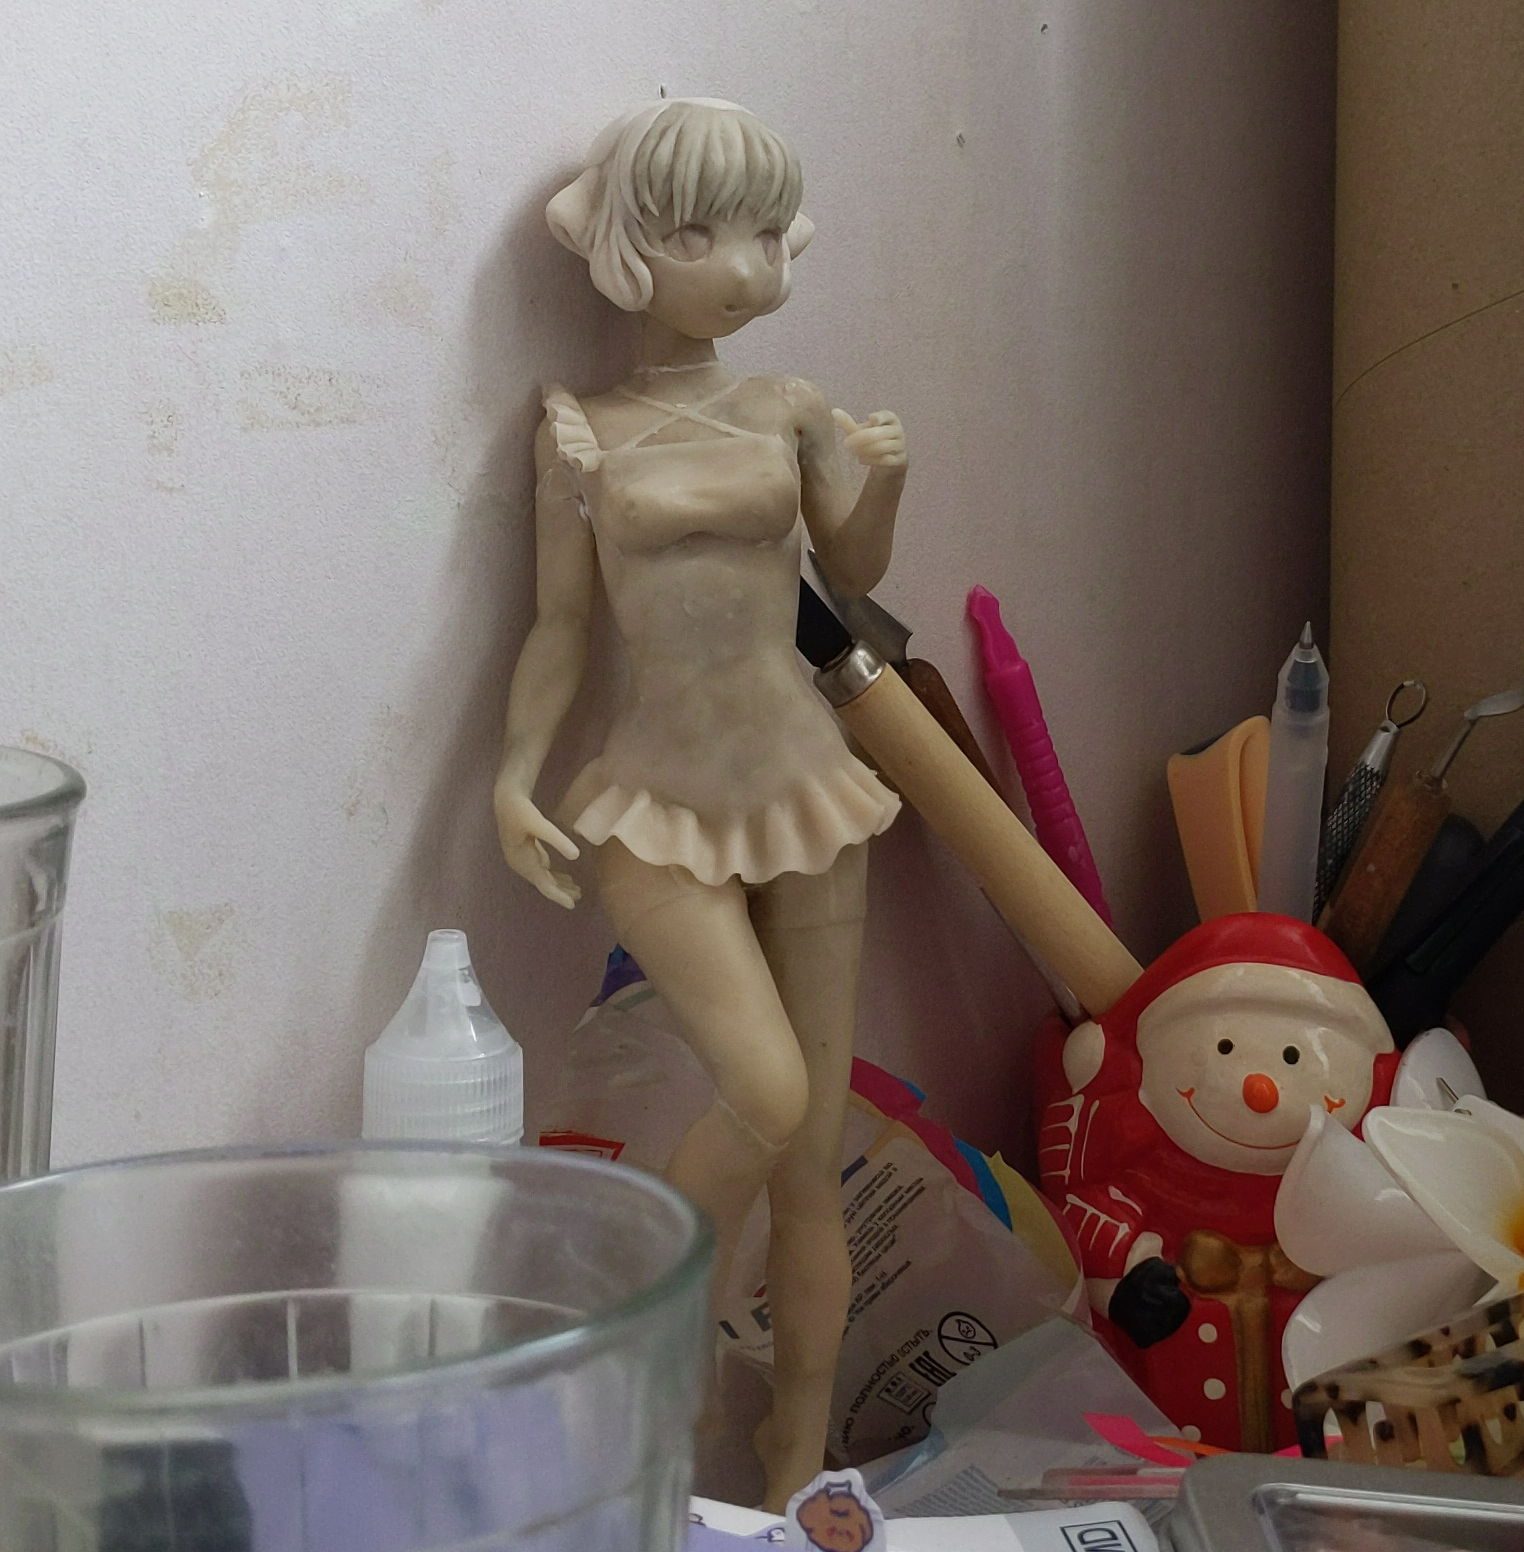
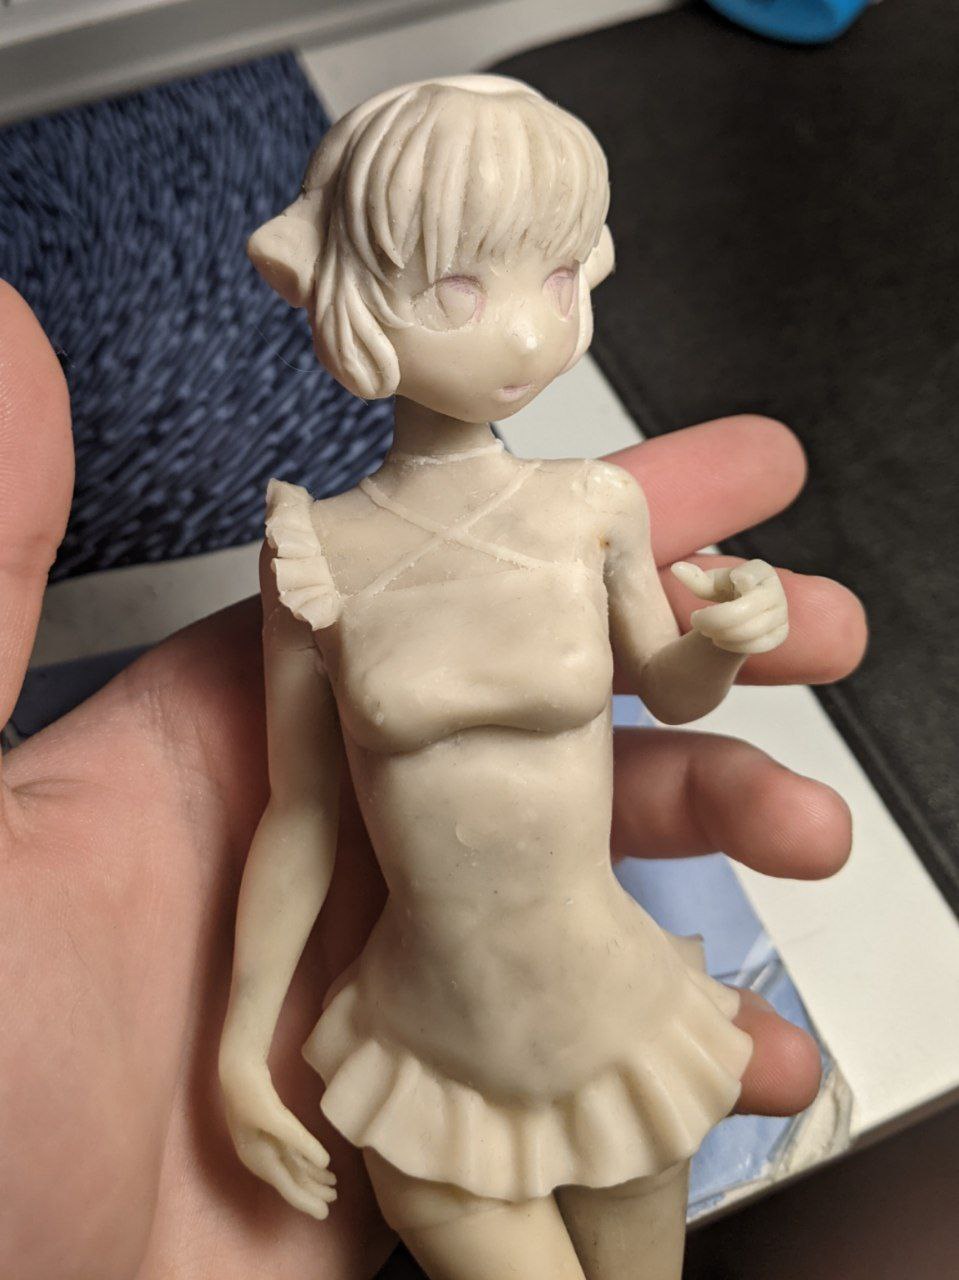
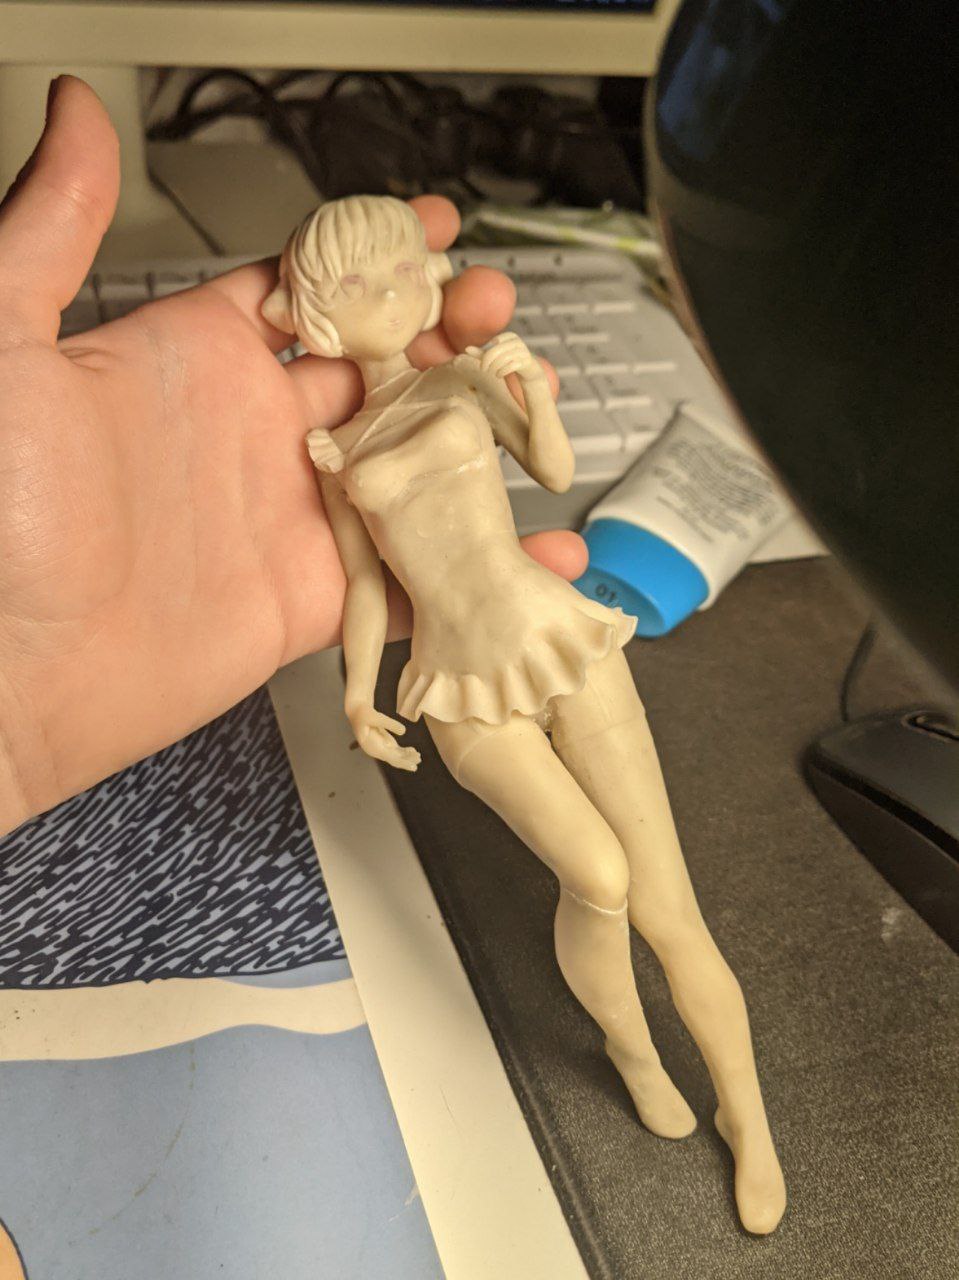
I decided to make Chii from Chobits. I spent the whole winter break on sculpting her. I'd wake up, brush teeth, make coffee, grab the mug and start sculpting right away, without even having breakfast. It felt surreal how concentrated I was, I'd make almost no breaks at all and sculpt until late at night. That was a very fun and fulfilling winter break.
Having a PROJECT is so nice. I had a ton of fun autistically researching the technical details, trying to follow the best practices, troubleshooting and coming up with my own ways and techniques.
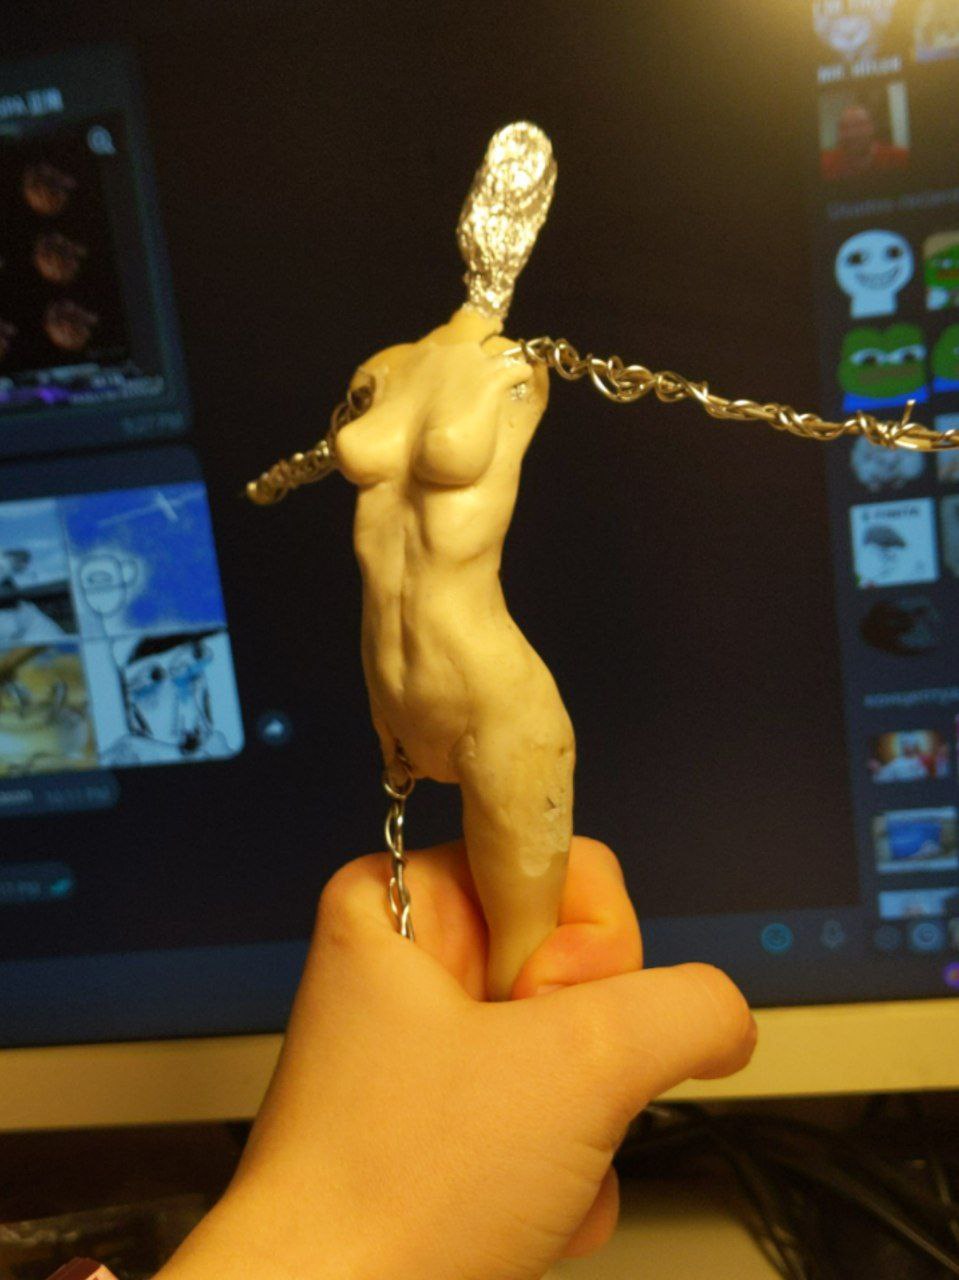
Wire armature
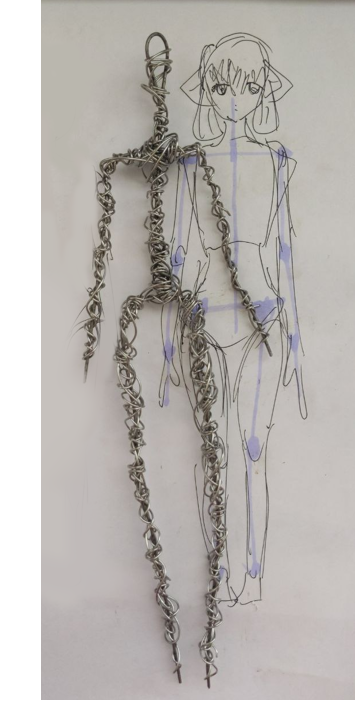
I started with drawing what I approximately want to get in the end and then made a metal wire skeleton. Made a lot of mistakes with it. I wrapped a second layer of thinner wire over the base of stronger wire in order to make the whole structure sturdier, also to give the clay something to grip onto, so it doesn't slide off the armature. And I, uh, tried too hard. The armature ended up being too bulky and the wire would show through the clay later on.
As if that wasn't enough, I also decided to
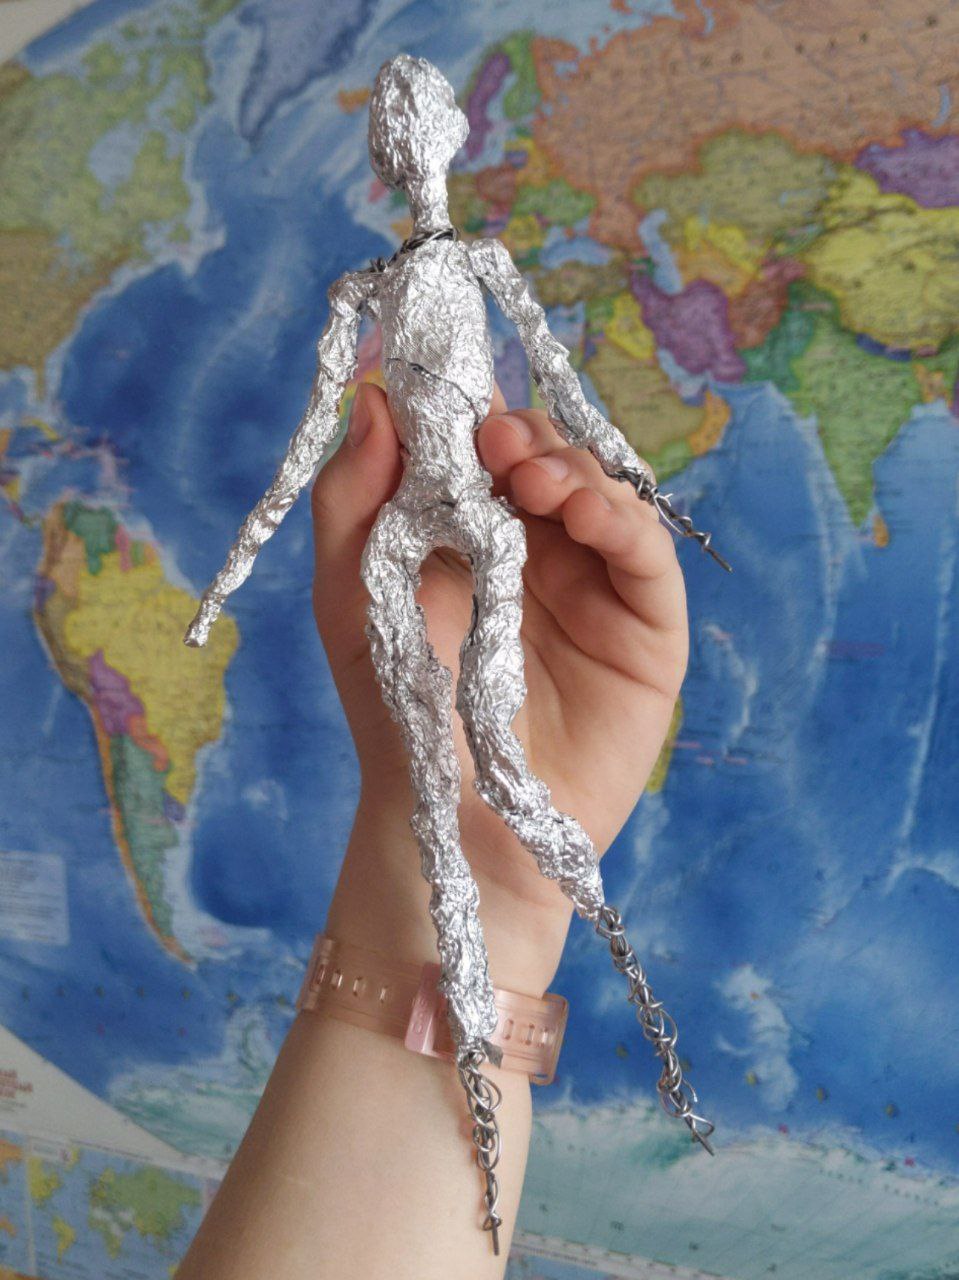
The foil would show through the clay. It would tear. Small pieces would mix with clay and make it unusable. Eventually I gave up, disassembled what I've already done, cut the baked parts with a knife, removed most of the wire and foil and started over.
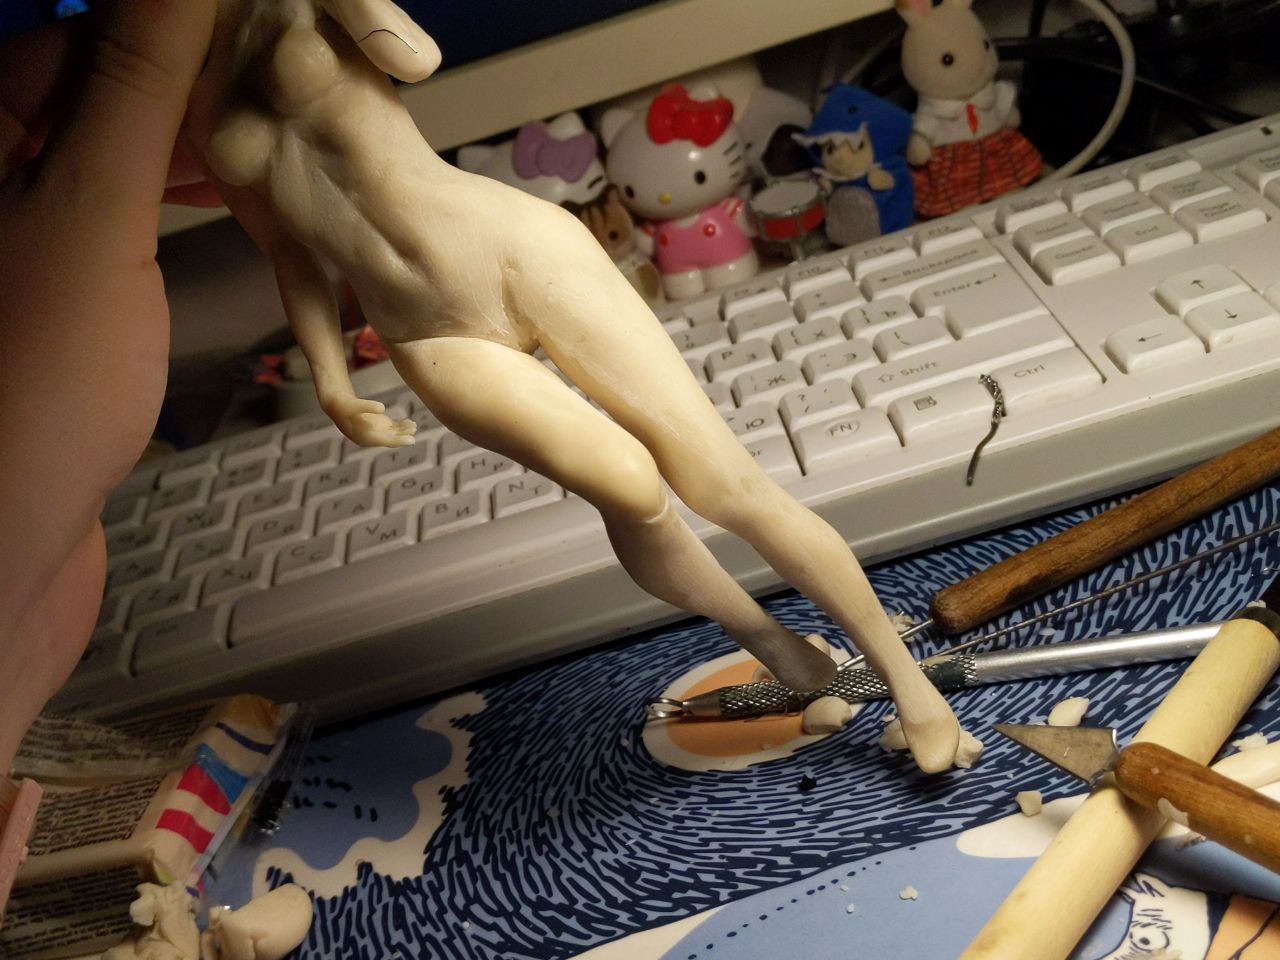
Can't underestimate the importance of the armature for structural integrity. I inserted wire into fingers on one hand and didn't for the other hand, thought it's going to be okay regardless. Then I accidentally dropped the figure several times and everything stayed in place, except for the fingers that didn't have wire in them.
Sculpting
I used whatever I have lying around the house as tools, for example, I used a shampoo bottle as a rolling pin for getting thin sheets of clay. Most useful tool was a precision knife. You can do literally everything with it, it cuts through the baked clay as well and is great for small details.
When I started making clothes, I also bought liquid polymer clay to use it as glue. It hardens exactly the same way normal clay does, but it's liquid until baked.
Baking
A very rough explanation of how the curing occurs: polymer clay is based on resin and contains plasticizers that soften the clay and give it plasticity. These plasticizers burn out at curing temperature and now there's nothing left keeping the clay soft.
Each clay has its own baking temperature, mine is cured at 130°C. If you underbake the piece, it's going to be brittle; if the temperature is higher than necessary, you risk burning it.
A separate oven thermometer is a MUST. Ovens often lie about the current temp and you need to be very precise with it. Can't be more happy that i got one, turns out my oven can lie up to 20 degrees.
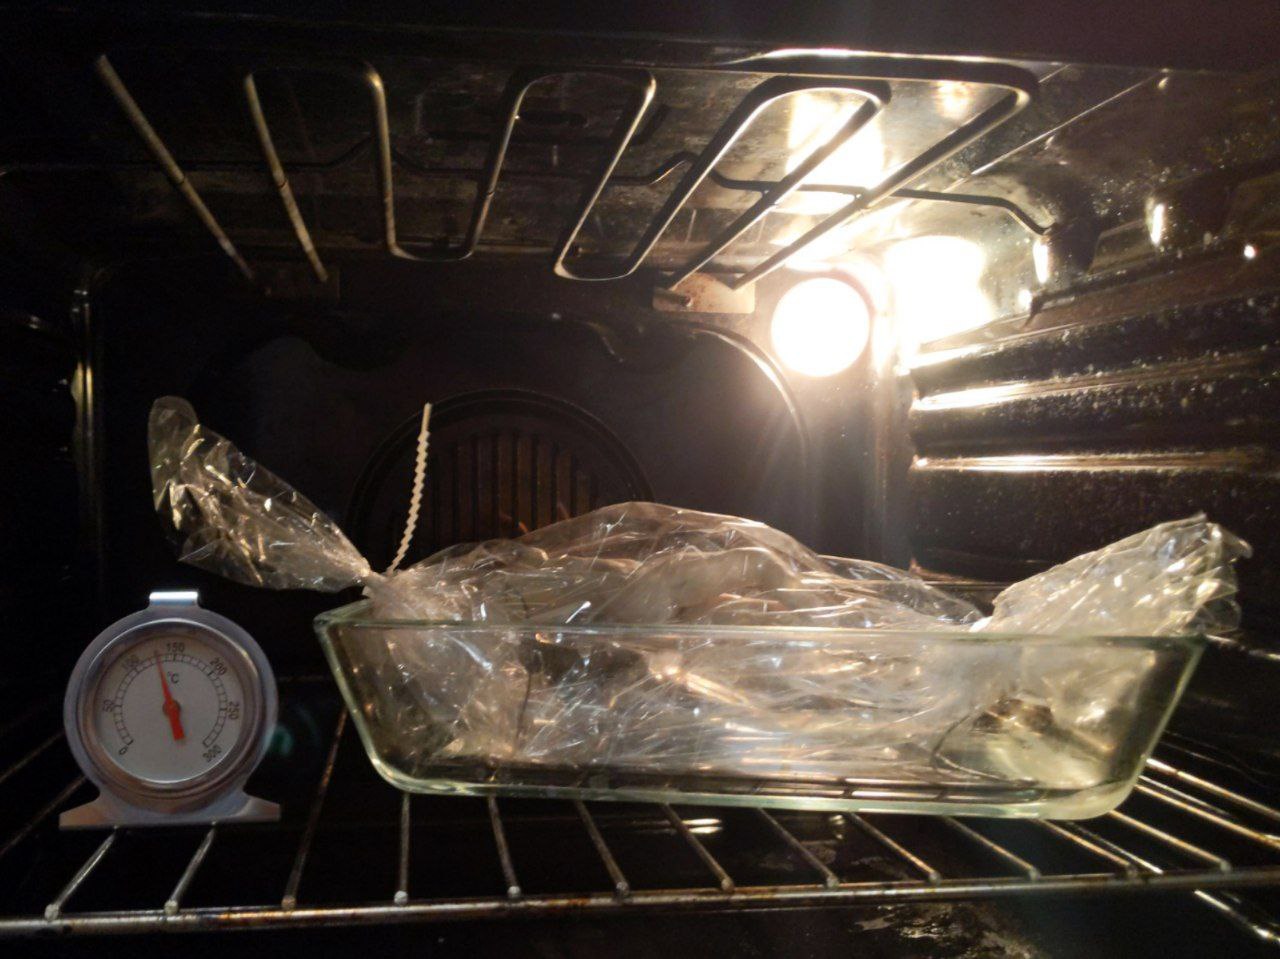
I also wrapped the figure into a baking sleeve, because polymer clay releases fumes into the air at high temperatures. They are theoretically harmless, but I decided I'm going to be taking all of the extra precautions.
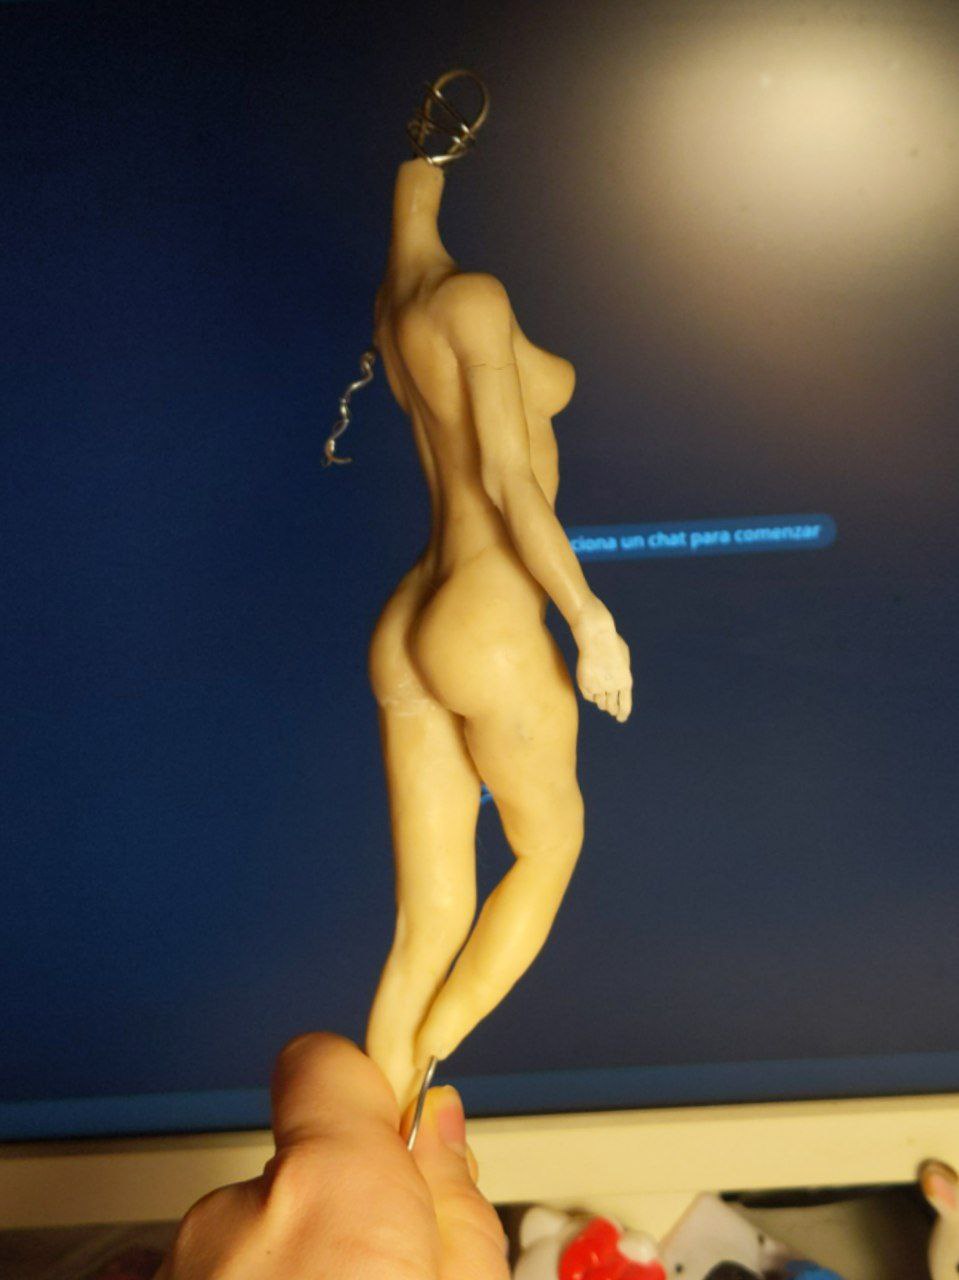
Initially I wanted to make the whole body first and then bake it, but I quickly realized that's probably not really possible.. For example, I'd make the chest and switch to the legs. And once I'm done with them, the chest would be completely smoothed out at this point from all of the touching.
So I've decided to do it in parts and bake them consecutively. I was afraid I could fuck up the overall balance and lose cohesion if I do the parts separately, one by one, but it was fine in the end, I think.
A very comfy property of the polymer clay is that temperature is more important than time. You can theoretically keep the piece in the oven for an unlimited amount of time, as long as you are maintaining the required temperature. That means you can bake it for as many times as you want: harden a part, then attach new details to it, bake it again and so on...
I autistically counted all of the bakes I performed and at the current moment there were 16 of them. One bake would take around ~20 minutes. Imagine the electric bill...
Smoothing out the surface
At first I was planning to sand the figure after bakes, bought a set of sandpaper and a respirator (inhaling the polymer clay dust is nothing good), but I quickly realized I ABSOLUTELY HATE IT AND I DO NOT WANT TO SAND. It's so boring and time consuming and exhausting..
Started searching for other ways to smooth the surface. Found that isopropyl alcohol works the best for me. I apply some with a brush before baking and it improves everything. It also removes dirt and dust.
People use turpentine and other chemicals for the same purpose, they may work better, but they smell absolutely hazardous...
That's it for now.
I'm busy with my studies lately, so I don't really have time to continue working on the figure. I'll post part 2 once I paint it.